Are you excited to start a WordPress blog? Of course, you are!
The only problem is you don’t know the first thing about starting a blog. You are probably afraid to start one thinking it’s costly, burdensome and for the tech-savvy.
This post contains some affiliate links. We may receive a commission for purchases made through these links. See the disclosure for more details.
Well, this changes today as I show you exactly how I started a blog on a shoestring budget. I promise you it is easy and no coding is necessary.
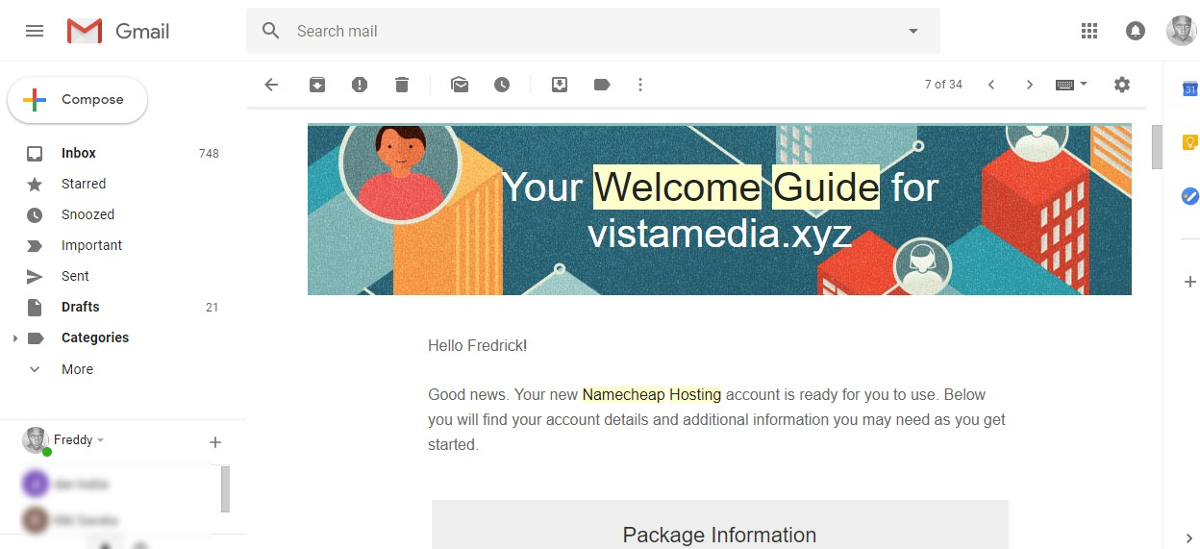
Spoiler alert: You can get one month of free hosting courtesy of Namecheap.
If that sounds good, let’s get down to business.
How to Start a WordPress Blog
In today’s post, I show you how to start a WordPress blog. In the future, you and I will cover content strategy, driving traffic and, ultimately, making $$$ with your WordPress blog.
For illustration purposes, I use Namecheap, a popular host, and domain registrar. Why not any other company? I run some WordPress blogs on Namecheap, and their service is fantastic.
That being said, setting up a WordPress blog is relatively the same on different hosts and domain registrars.
In simpler terms, you learn how to:
- Buy a domain name, e.g., wpappstore.com
- Setup a web hosting account, and
- Start a WordPress blog
Also, this post is about setting up a self-hosted WordPress blog and not the free flavor at WordPress.com.
Buy a Domain Name
The first thing you do is name your blog. Reason being you love it, and you plan to grow it. Having a name will inform the domain name you choose.
But first, what is a domain name?
A domain name is merely the web address readers use to find your blog. For instance, the domain name for this blog is wpappstore.com.
Here is a screenshot of my address bar showing the domain name:

You want to go for a short and catchy domain name. Also, you may want to add your main keyword to the domain name, but that’s a WordPress SEO article for another day.
The point is, go for a short and sweet domain name that represents you or your business. If you’re struggling to pick a domain name, you can use tools such as Namemesh, Instant Domain Search or Nameboy.
Nowadays, most web hosts offer a free domain name for the first year, but I prefer buying domain names separately. My favorite domain registrar is Namecheap, but feel free to go with a registrar of your liking.
How Much Does It Cost?
A good domain name costs about $12 bucks per year to maintain. Remember, you risk losing the domain name if you forget to renew on time.
For example, I started with vistamediainc.com, but I didn’t pay on time, so I lost it. Now, I use vistamedia.xyz. Also, I turned on domain auto-renewal.
How to Buy a Domain Name
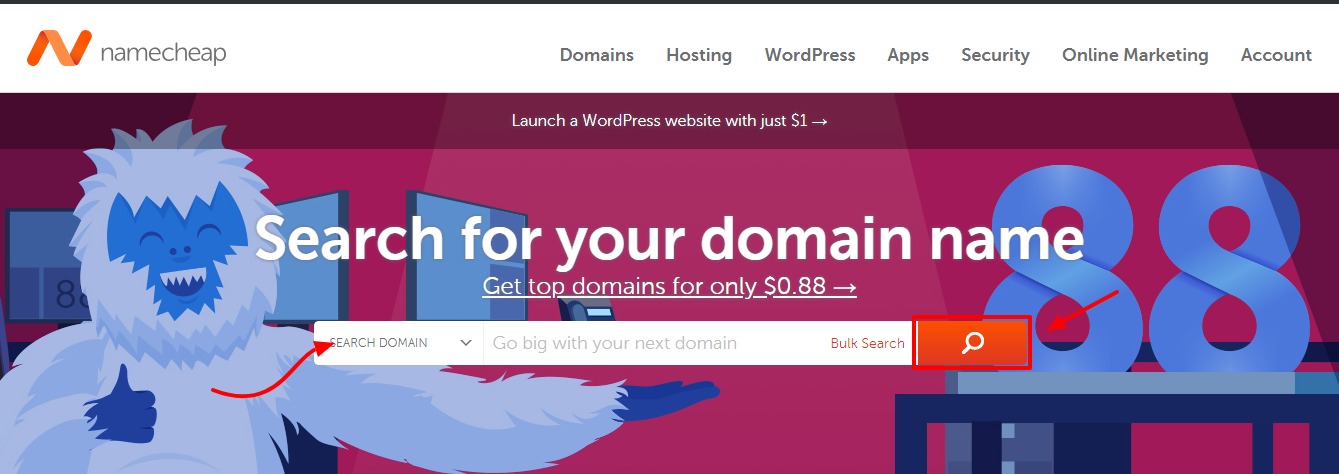
Point your browser to Namecheap. Next, enter your preferred domain name in the search box and hit the search button as shown below.
Namecheap checks if the domain is available, and if it’s already taken, they offer you a couple of suggestions.
Below, see the different suggestions Namecheap offered for our sample domain newblogwp.com.
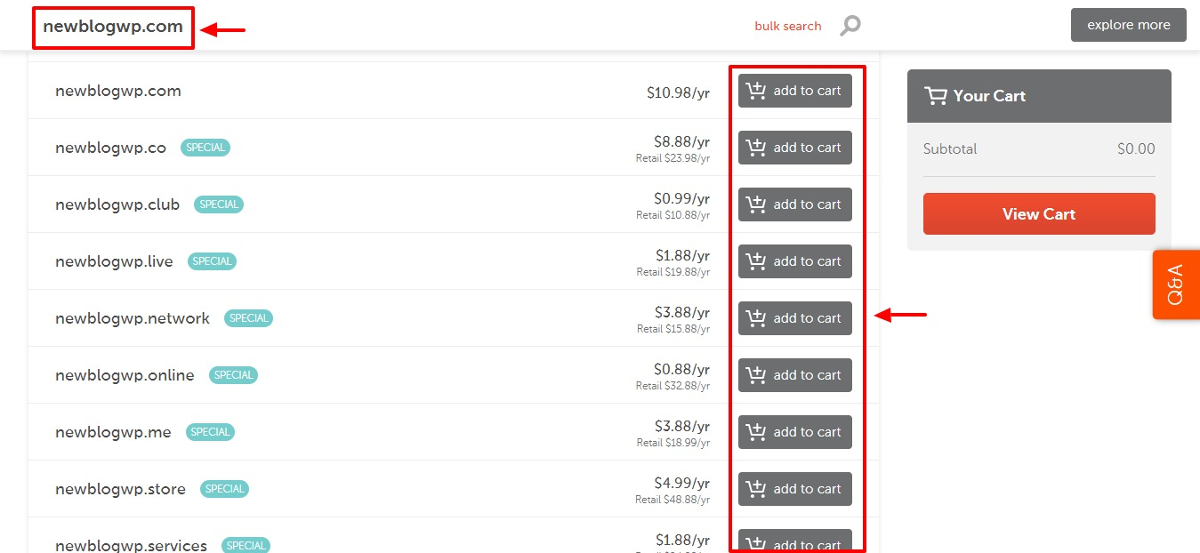
On the above screen, choose your preferred domain name and hit the Add to Cart button next to it.
The Cross-sell
Just like any other host, Namecheap will try to cross-sell you on some of their other products including hosting, SSL, managed WordPress and private email as shown below.
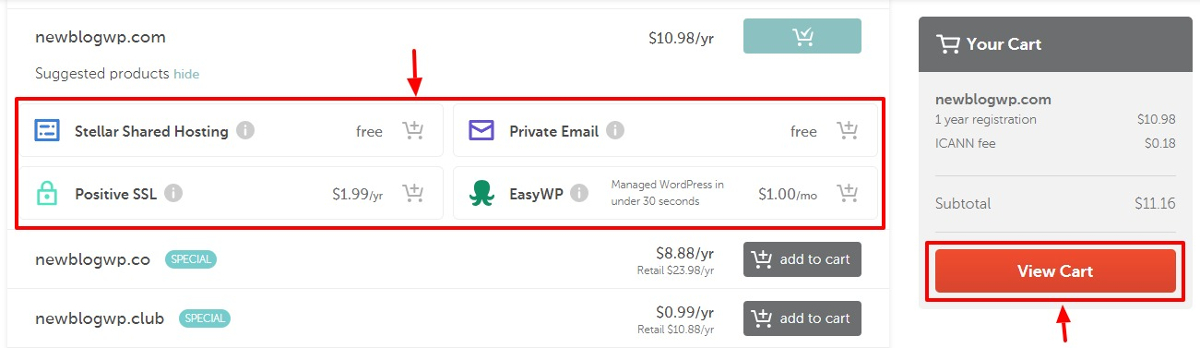
On this page, you can choose to try Namecheap stellar shared hosting for a month (if you’d like to test the waters). Additionally, you can select Positive SSL so that you can install SSL later on. Next, mash on the View Cart button.
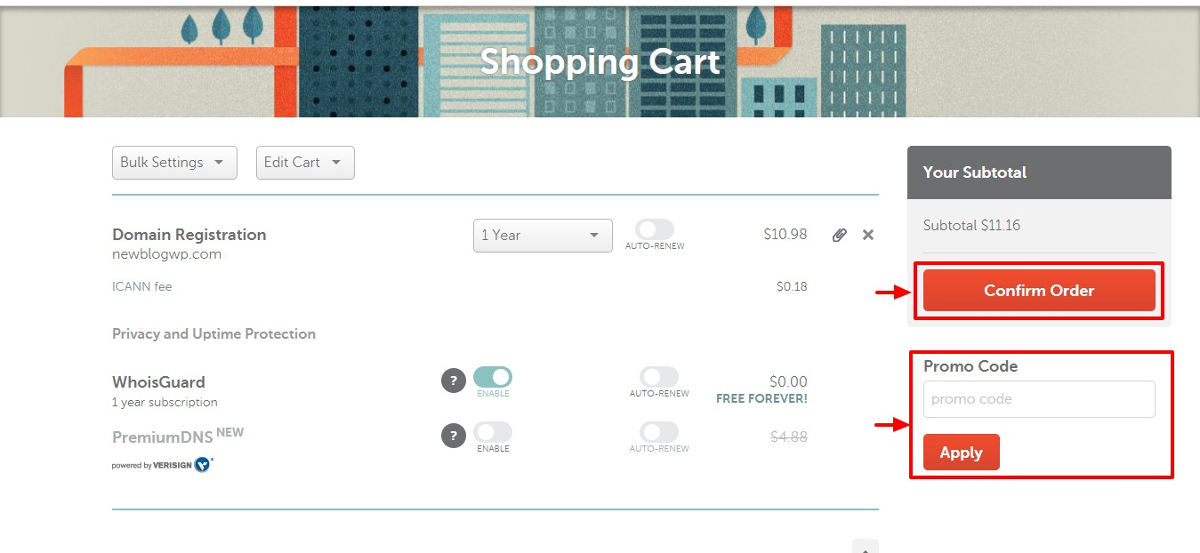
Confirm your order details on the next page and if you have a promo code, grab yourself a discount. After this, hit the Confirm Order button as shown below.
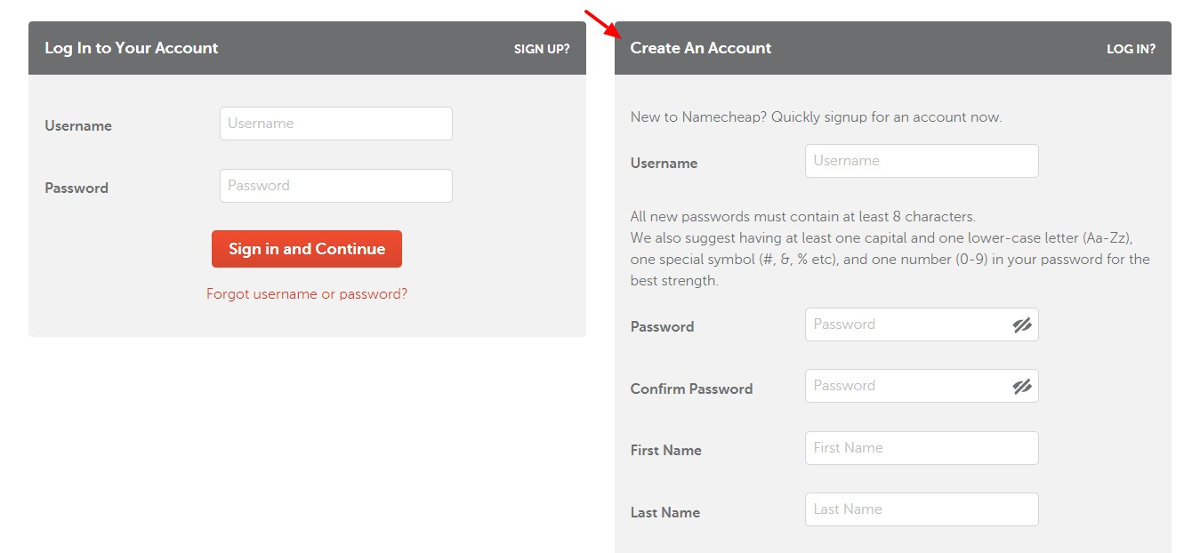
You’ll be prompted to either login or create an account. Since it is your first time, fill out the account registration form accurately, scroll to the bottom and hit the Create Account and Continue button.
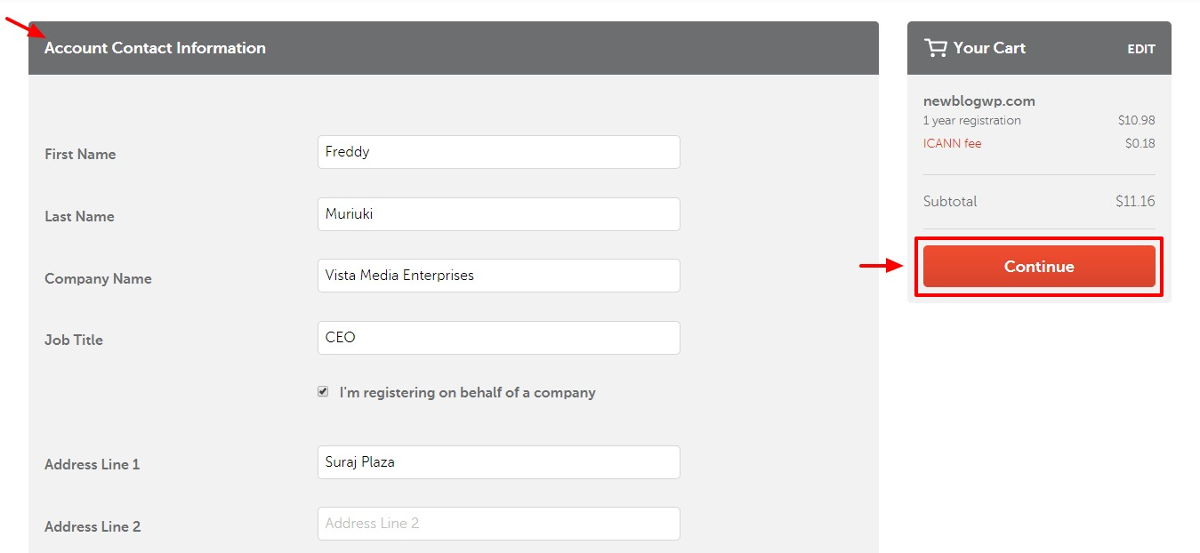
The next page allows you to provide more details for your Namecheap account. Add the necessary information and hit the Continue button as shown below.
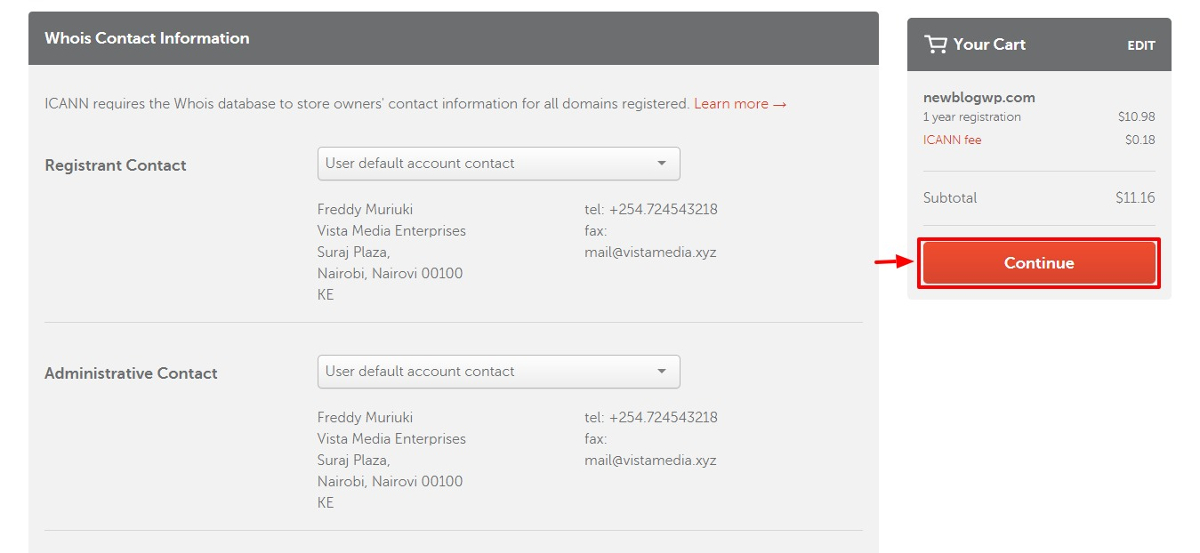
Set up your Whois information on the next screen, and click the Continue button.
So far so good. The total cost upto this point is $11.16, which includes the domain name and the ICANN fee.
Now, you need to pay. On the next screen, choose your preferred payment option and click the Continue button as shown below.
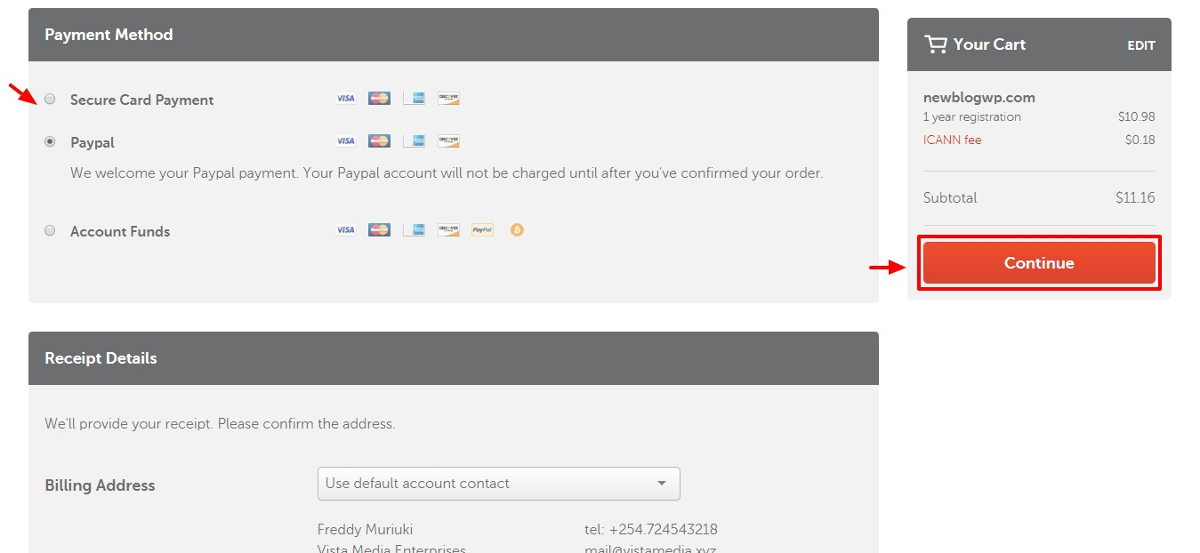
I use PayPal for online transactions since I can make and receive payments without revealing my card details.
It’s a good idea to create a PayPal account if you don’t have one already. The process is easy and free.
Authorize payment and confirm your purchase on the next screen:
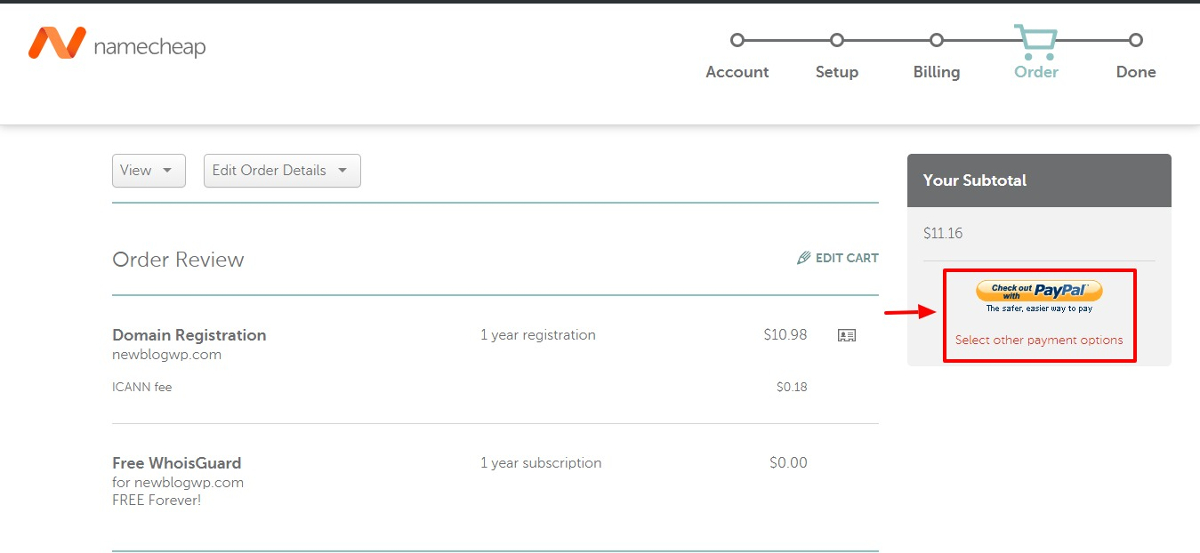
If you use PayPal, you’ll be redirected to PayPal to complete the purchase as shown below.
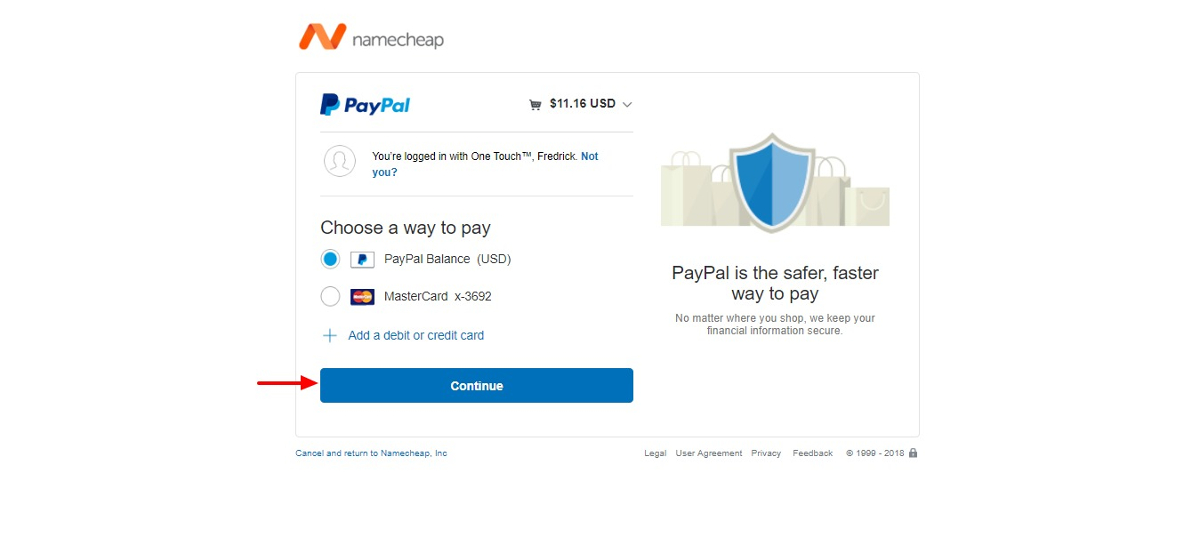
Hit the Continue button and wait out the transaction to complete. Upon successful payment, you’ll be redirected back to Namecheap.
Now, you have a domain name ready, but it does nothing, i.e., you don’t have a working WordPress blog. You need a host where your WordPress blog will live.
Buy Hosting
If we compare a WordPress blog to a physical store, hosting is the business premises, and your domain name is the business address.
Finding the best host needn’t be challenging. And luckily for you, Namecheap offers fantastic hosting packages meaning you needn’t go elsewhere.
And since you already have an account with Namecheap, buying a hosting package is as easy as pie.
What to do? Head over to Namecheap. Mouse over Hosting and click Shared Hosting as shown below.
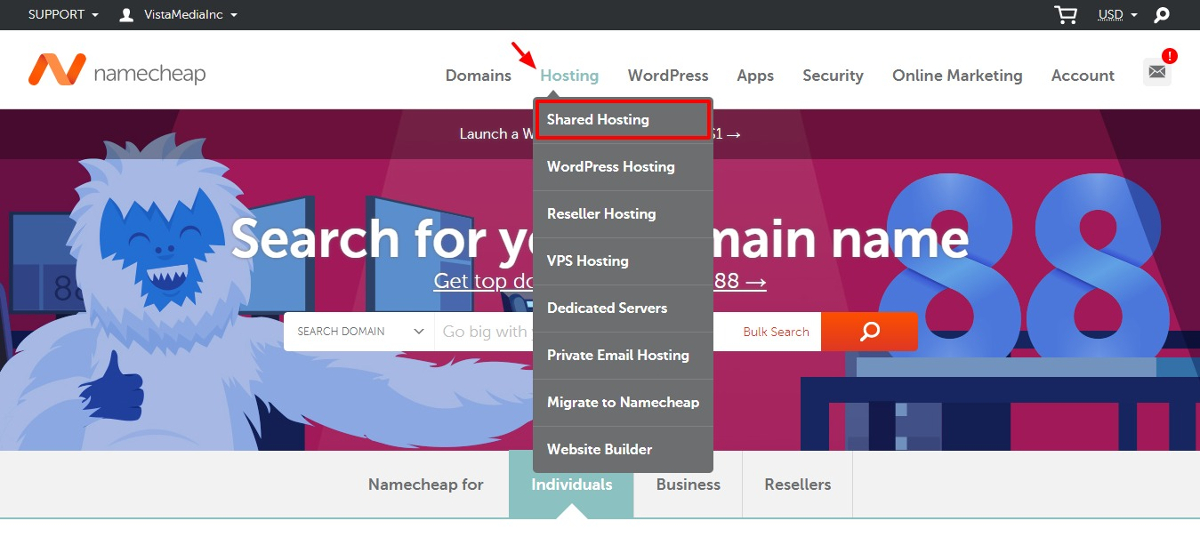
As a beginner, I recommend shared hosting. You can always upgrade to bigger packages later when you’re ready. Clicking Shared Hosting launches the following screen.
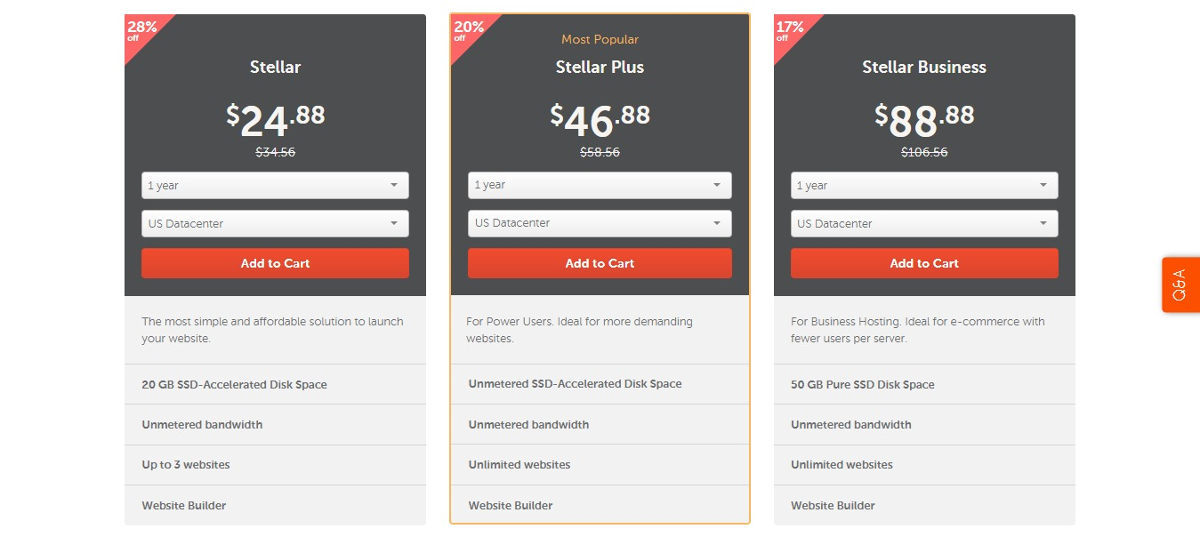
Pick the Stellar package (or any of the other packages) by clicking the respective Add to Cart button.
The screenshot above shows the introductory prices for the first year of hosting. Stellar Plus is the most popular package. It offers you unmetered disk space to host an unlimited number of websites.
At times, Namecheap throws discounts your way. Once, I remember paying $9.88 bucks for a whole year of hosting! That’s less than the yearly cost of a domain name.
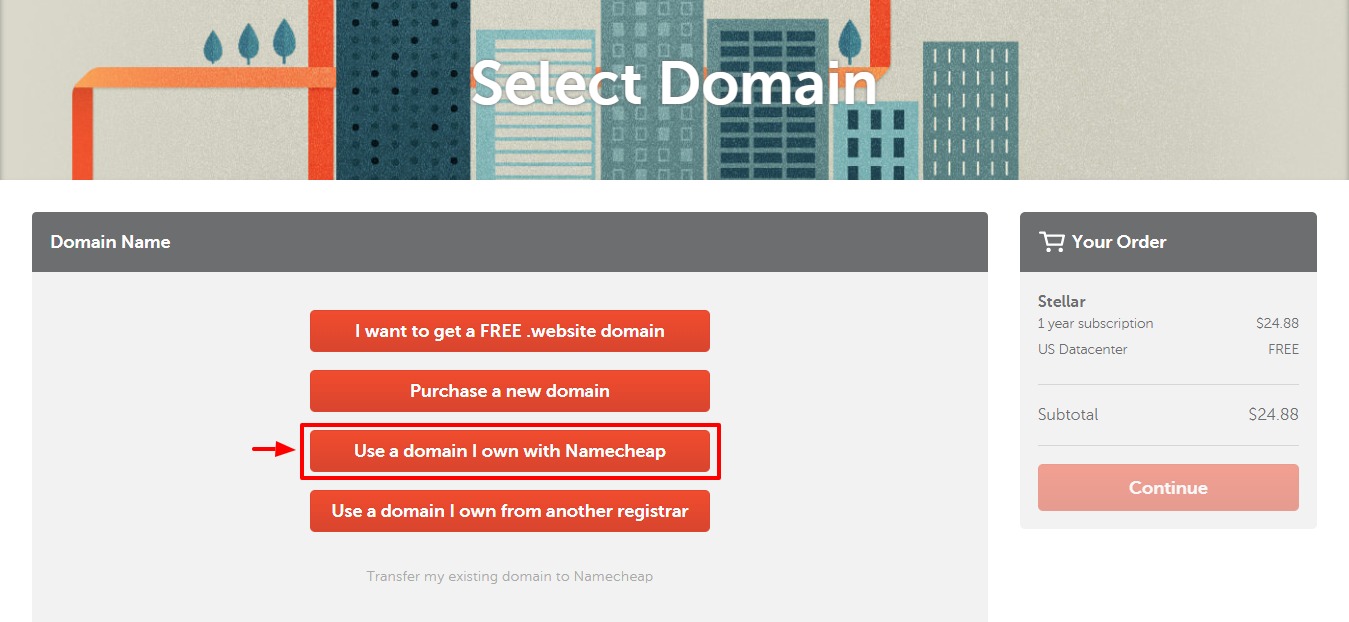
That aside, select Use a domain I own with Namecheap button on the next screen as shown below.
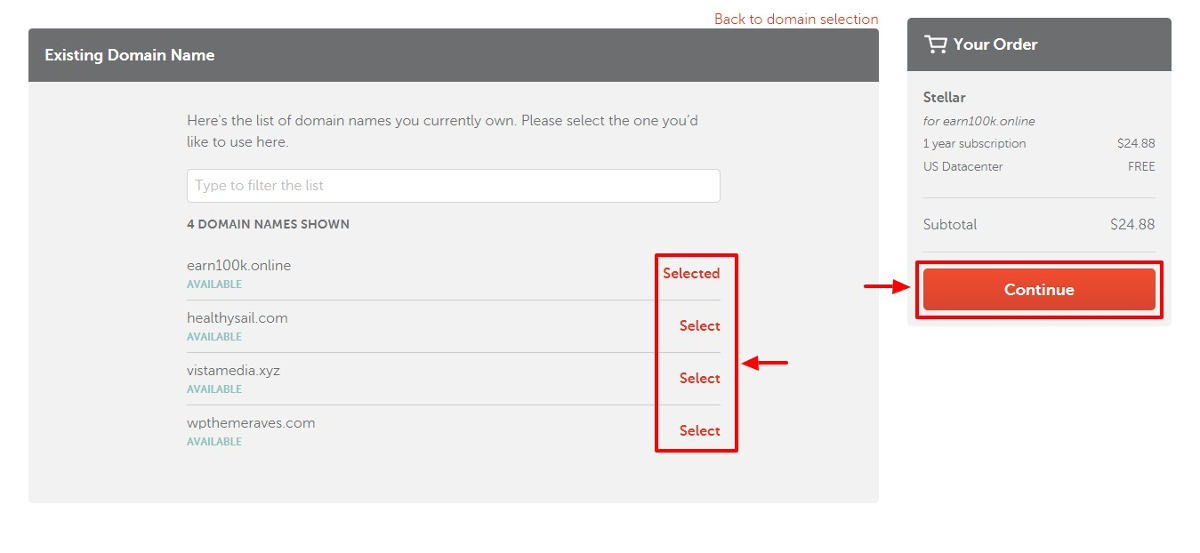
On the next screen, select the domain name you bought earlier. My screenshot below shows four domain names.
Your screen will show only the domain you bought unless, of course, you buy some more. After selecting the domain, hit the Continue button.
You’ll agree the process is pretty much straightforward; just a matter of point and click. Next, review your order and hit the Confirm Order button as seen below.
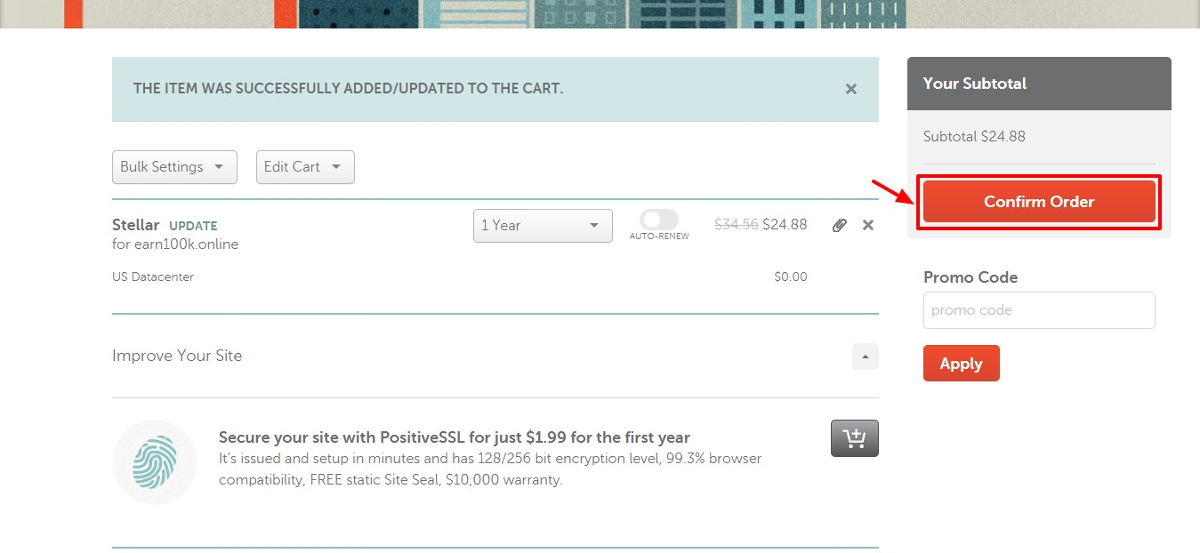
On the next screen, choose your payment method and finalize the purchase. Now your domain name and hosting is ready.
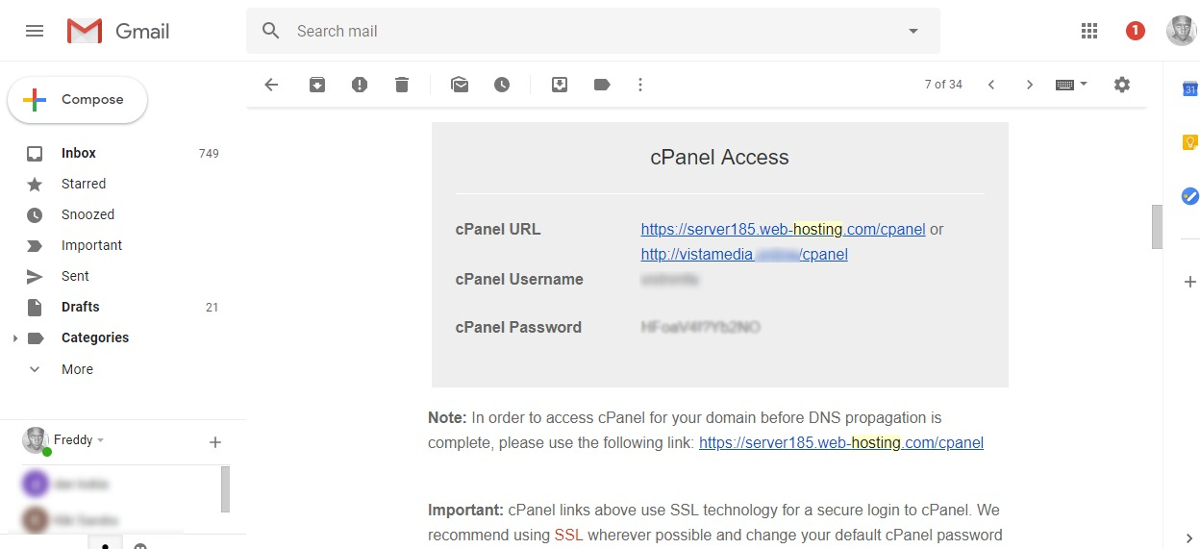
Before you do anything else, check your email account for relevant info about your domain and hosting. This includes your cPanel login details among other things.
Total cost so far:
- Domain name = $11.16
- Hosting = $24.88
- Total = $36.04 bucks for the first year
Now we need to install WordPress.
But First…
Let us do a little housekeeping to ensure all cogs are oiled.
Login to your Namecheap account, mouse over your username and click Dashboard as shown in the screengrab below.
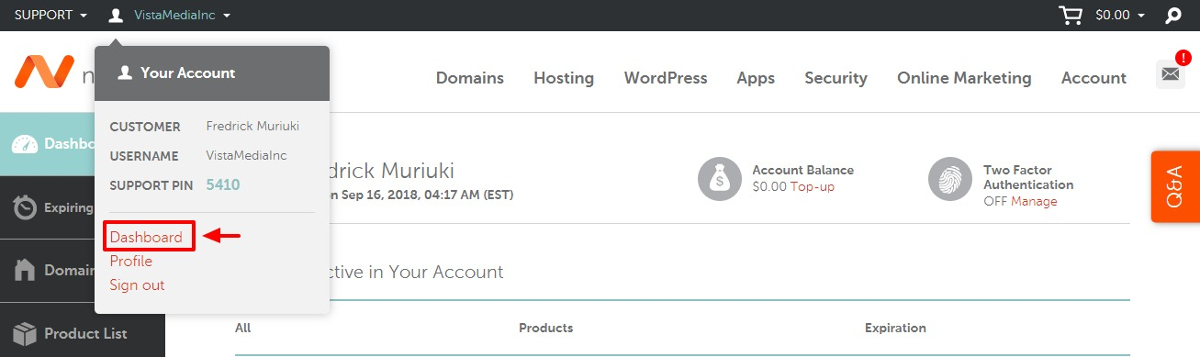
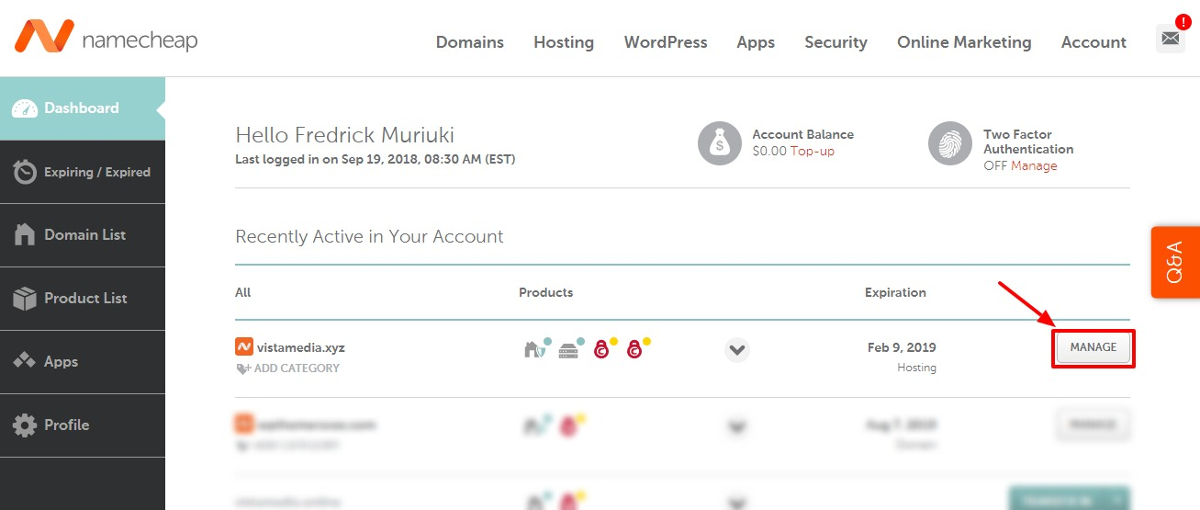
Your dashboard shows you all of your active products among other things. You should see your domain name, hosting and a couple of options.
Click the Manage button next to your domain name. See the image below.
On the following screen, you can manage your domain name and hosting account. You can even change your domain name’s nameservers if you’re hosting elsewhere.
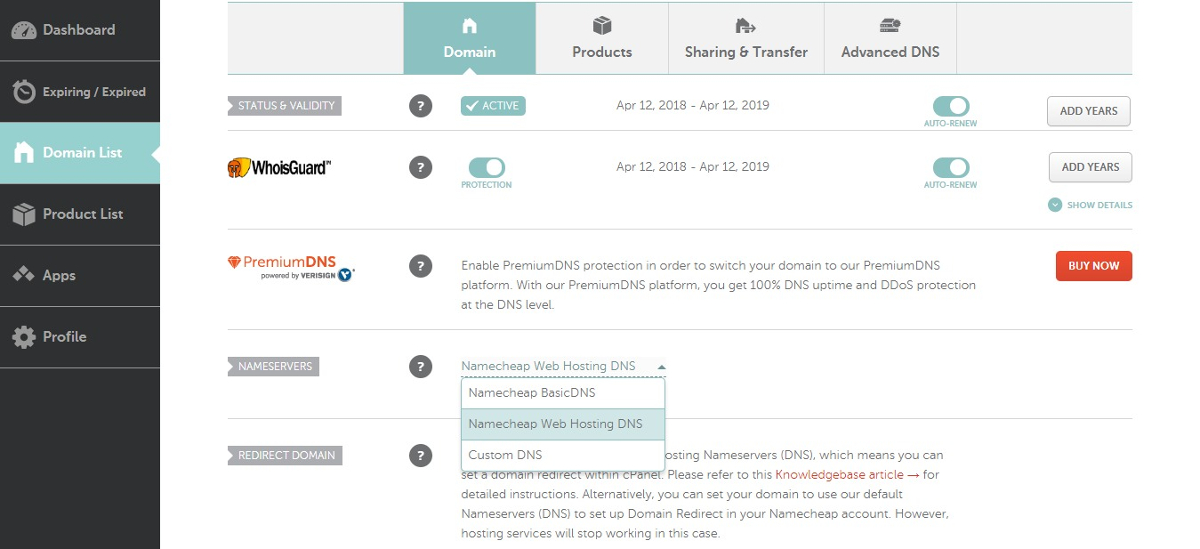
Confirm the nameservers are set to Namecheap Web Hosting DNS. Look around and familiarize yourself with the Namecheap Dashboard.
Install WordPress
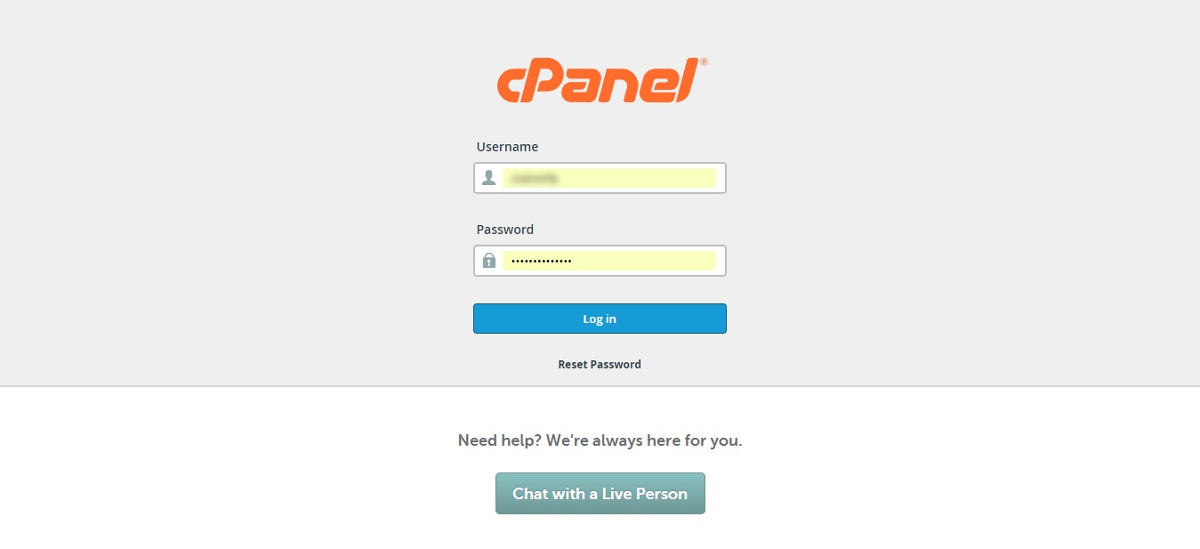
With a domain name and hosting ready, it is time to install WordPress. To do that, you need to login to your cPanel using the details you received via email.
Here is how the cPanel login page looks like:
After successful login, you’ll be redirected to the cPanel main page as shown below.
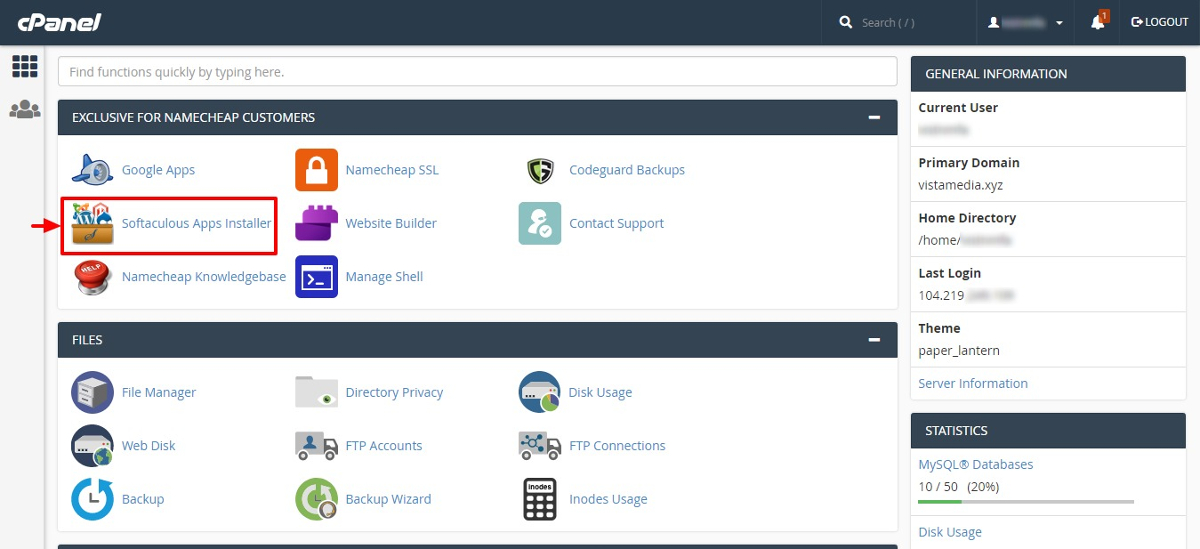
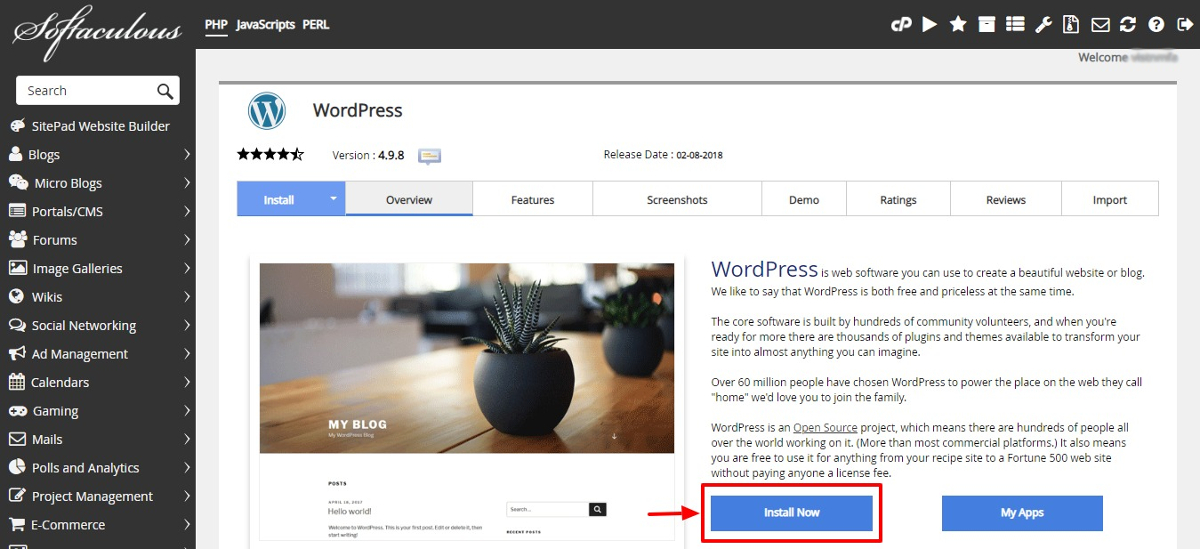
To install WordPress, hit the Softaculous Apps Installer icon as shown in the image above. This will launch the app installer. Click the WordPress button to start.
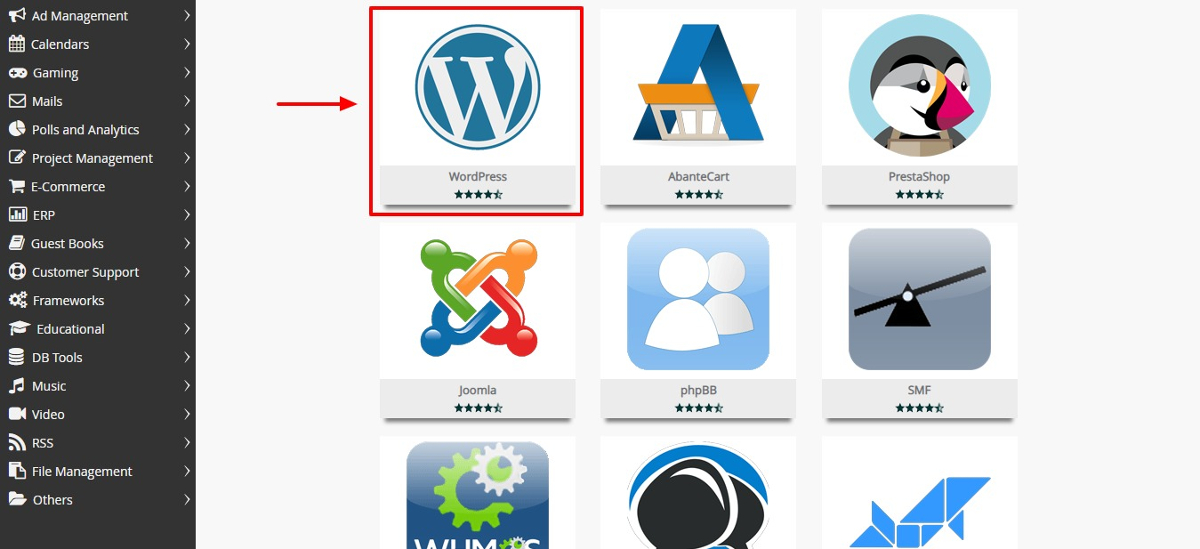
On the next screen, click the Install Now button as shown below.
Next, choose your domain name, site settings and define your login credentials on the page shown below.
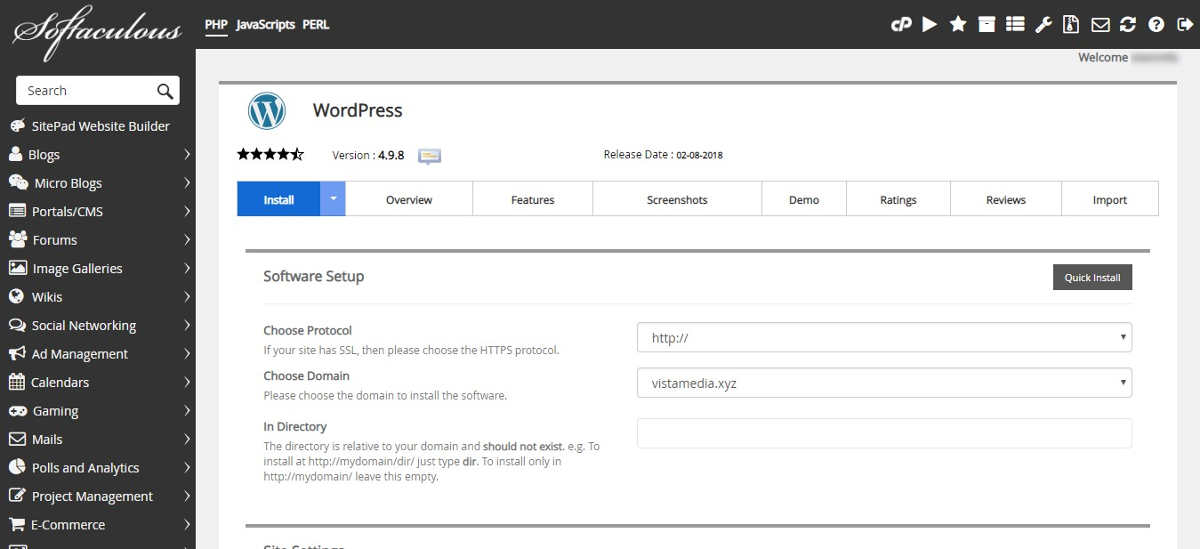
Aside: As we saw in how to secure your WordPress site, create firm login details and never use admin as your username.
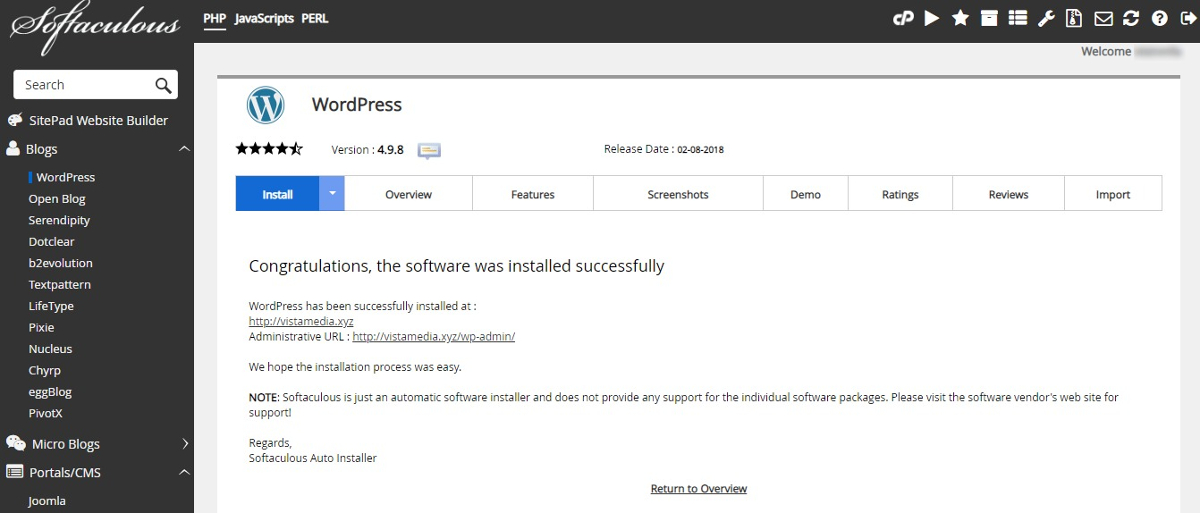
After defining your site settings, scroll to the bottom and hit the Install button. Wait out the installation process to complete. If everything goes well, you should see the success page below.
Point your browser to your domain name and see your new WordPress site, complete with the Twenty Seventeen theme. See below.
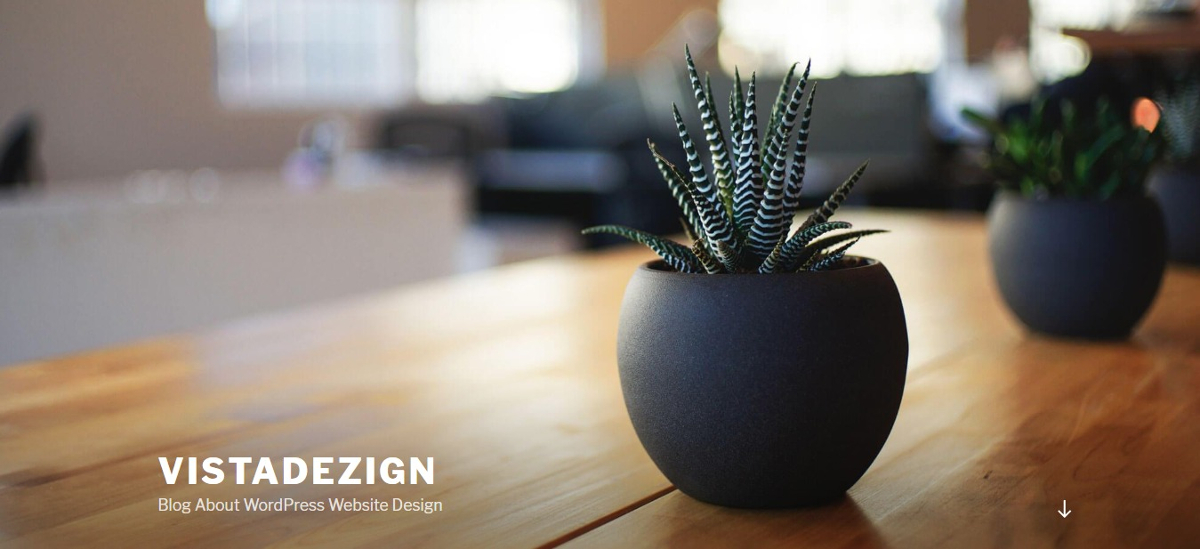
Pretty neat, right? You now have a new WordPress blog, you just need to customize it and add content in the form of posts and pages. Then promote it, make it big and ride off into the sunset.
WordPress Admin Dashboard
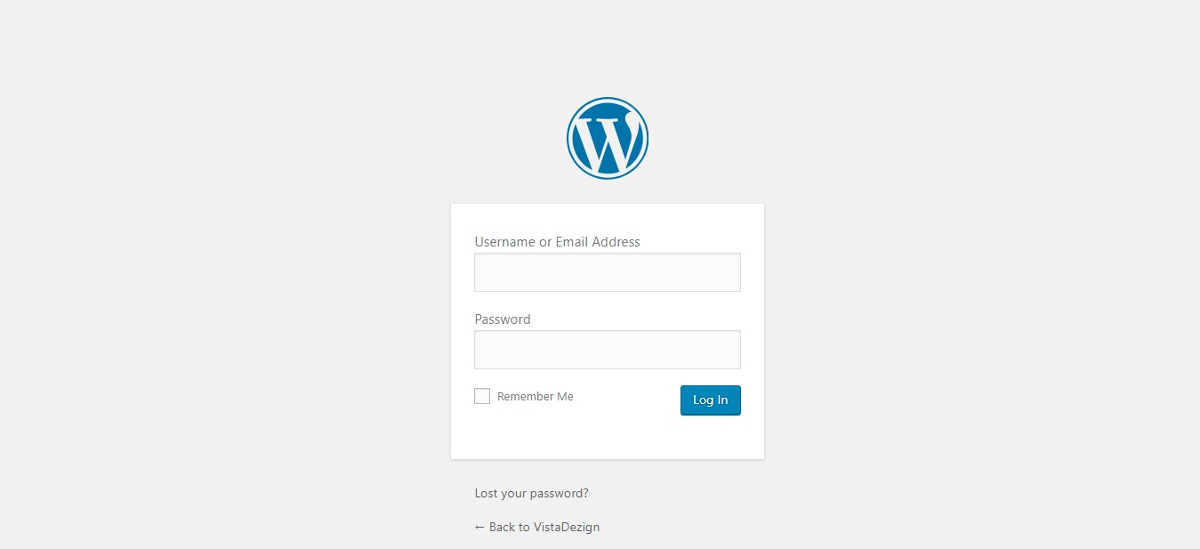
To add content, you must log in to your WordPress admin dashboard. To do that, add /wp-admin/ to the end of your domain name (example.com/wp-admin/) and hit the ENTER key.
Log in using the credentials you created when installing WordPress:
Upon logging in, you should see the WordPress admin dashboard as shown in the image below (I have highlighted the WordPress admin menu).
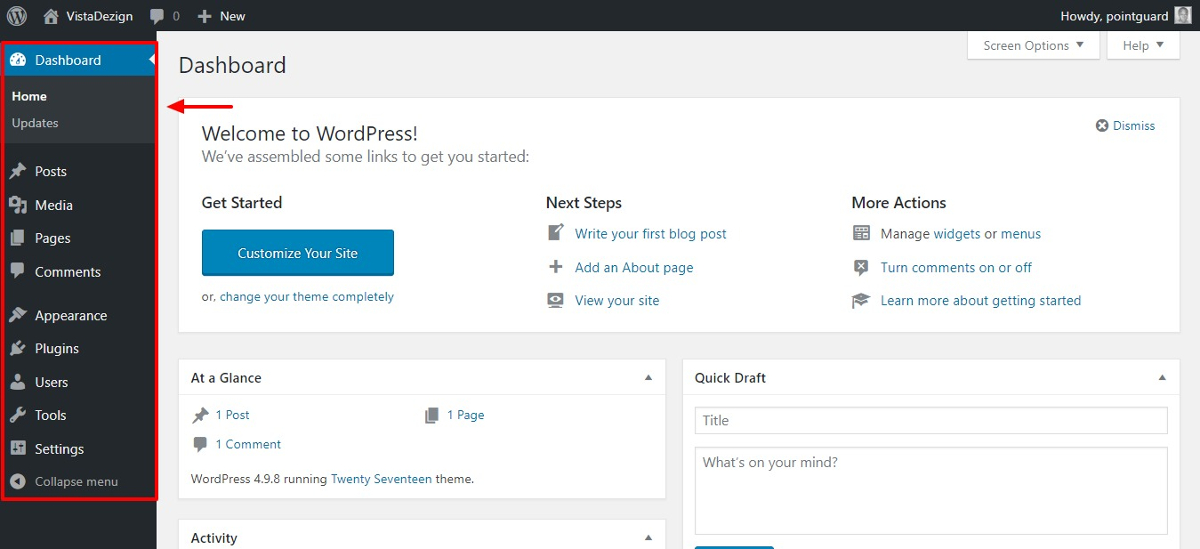
The WordPress admin menu helps you to design your WordPress blog extensively. You can change themes, install plugins, add new posts and pages, and do so much more right from within the WordPress admin dashboard.
However, we won’t go into these details in this post since our objective was simply to start a WordPress blog. In later posts, we shall discuss the WordPress admin in detail, content strategy, traffic generation and making money.
Final Words
As you’ve learned, you can start a WordPress blog easily and on a tight budget. There is absolutely no need to write code or engage in technical stuff. Start a WordPress blog by point and click right now with Namecheap.
Did you learn anything here today? Let us know your thoughts, suggestions, and questions in the comment section below.
What to hear about our latest deals and new posts? Subscribe below 👍