A/B testing is one of those things that everyone talks about but not everyone actually does. In fact, any random Google search will yield plenty of results on the benefits of A/B testing, common elements you should experiment with to improve traffic and conversions, and the best WordPress A/B testing plugins and tools on the market to date.
But again, if you know how effective split testing is, and how beneficial it can be for your website, and yet don’t perform any tests on your site, you have nothing to gain.
Today we’re going to briefly remind you of the importance of A/B testing on your website and share with you a unique way to run one very specific split test on your website using the free WordPress plugin Title Experiments.
So, let’s get started.
Why A/B Testing is So Important
A/B testing (also called split testing) elements on your WordPress website is a great way compare two or more versions of your site to see which one performs the best.
You can split test things like call to action buttons, images, color schemes, landing page copy, and even form fields to see which one nets you the most traffic, signups, and eCommerce sales.
Here are some of the most compelling reasons why A/B testing is important:
- Better Content. Find out which type of content site visitors like the most so you can offer them more of that, and less of what they don’t like.
- Lower Bounce Rate. Optimize your webpages based on A/B testing results to keep more site visitors on your website engaging with your content.
- Increased Conversion Rates. Whether you want more subscribers to your email list, or more long-term customers, split testing is the easiest way to find out which version of your site leads to higher conversions.
- Ease of Analysis. One of the greatest things about running A/B tests on your website is that the results are easy to analyze and put into action.
- Reduced Risk. If you decide to overhaul your entire website, changing elements at random runs you the risk of losing a lot of site visitors and money in the process if your changes don’t work. Split testing allows you to make small changes at a time and decide what really works before making site wide changes.
Of course, these are just some of the reasons A/B testing on your website is so important.
But for now, let’s take a look at how you can start A/B testing your site’s headlines using the free Title Experiments plugin.
Step 1: Install and Activate Title Experiments
The first thing you’ll need to do is install and activate the Title Experiments plugin.
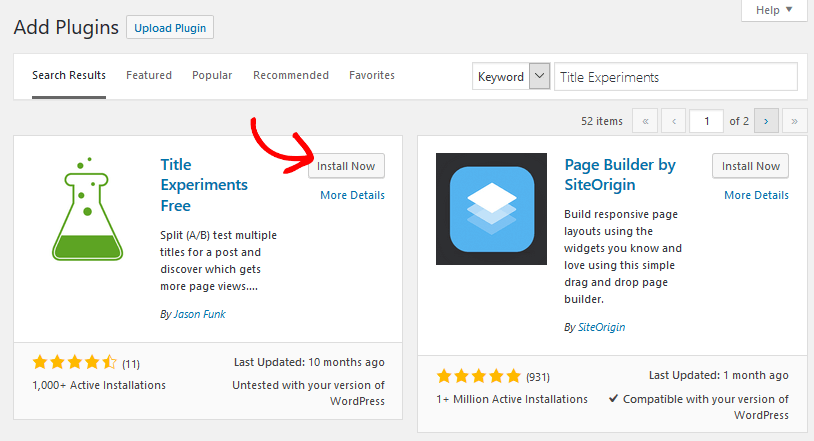
To do this, go to Plugins > Add New in your WordPress dashboard. From there, search for “Title Experiments.” Click Install Now and then Activate.
Title Experiments is now ready to be used on your website.
Step 2: Configure Title Experiments Settings
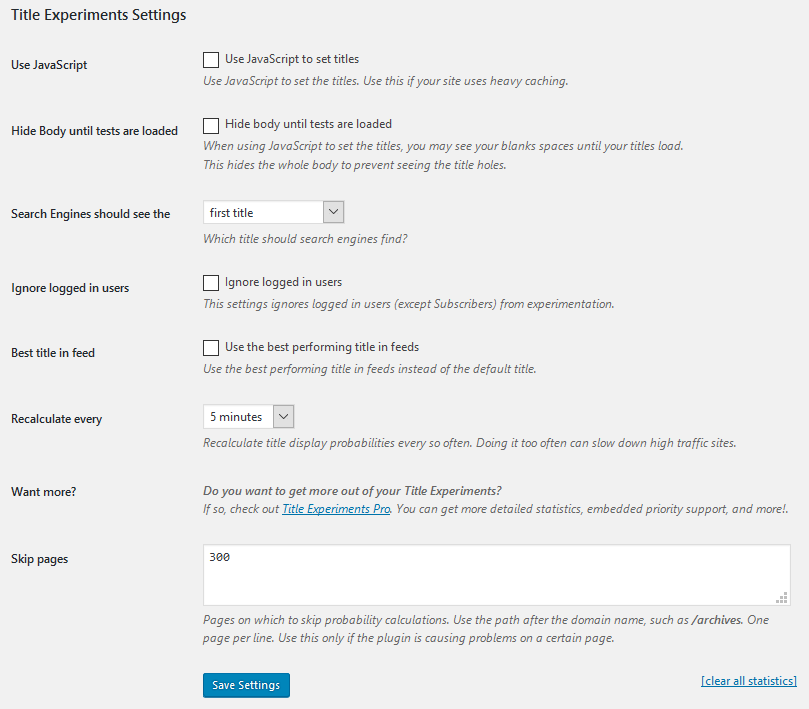
Once installed and activated, navigate to Settings > Title Exp Settings to configure the Title Experiments settings.
Here is a rundown of some of the most important settings:
- Use JavaScript: if your site uses heavy caching, select this box to prevent the same title from showing to site visitors because of site caching.
- Search Engines should see the: for SEO purposes, Title Experiments allows search engines to find the first title first. You can change this to best performing title or experiment if you want.
- Ignore logged in users: this will prevent those logged in to your website from seeing experiments.
- Recalculate every: by default, Title Experiments recalculates display probabilities every 5 minutes to get you the best results. You can change this, but lowering the time of recalculation may slow your site down.
When done, click Save Settings.
Step 3: Create an Experiment
Now that the plugin settings are configured, it’s time to use the plugin for your blog content.
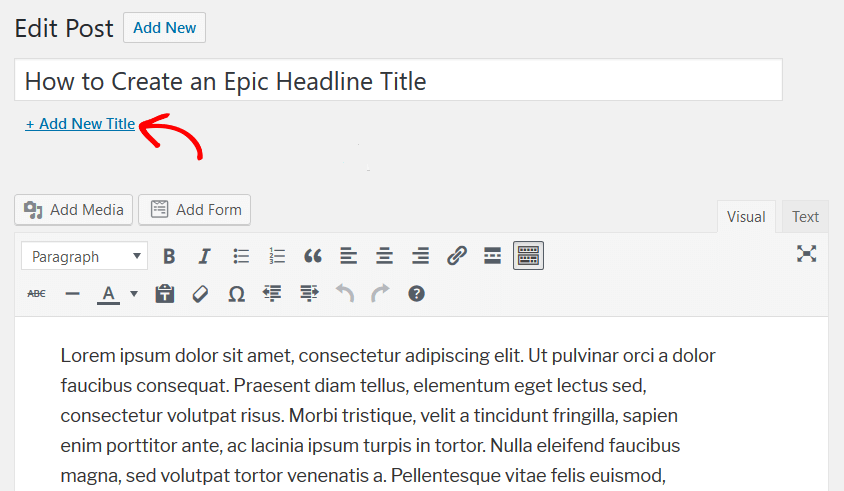
To do this, go to Posts > Add New to create a new post for your website’s blog.
Next, enter a headline in the section labeled Enter title here, just as would any time you were creating a new blog post. You’ll notice there’s a link underneath the traditional headline section labeled + Add New Title.
Here, you can add as many alternative titles as you want. Any titles you add will enter the experiment and be shown to a percentage of site visitors when people click on your website.
After you have added a few title alternatives, save and publish your post. Title experiments will automatically start displaying different titles to site visitors and collecting click through data for you to view.
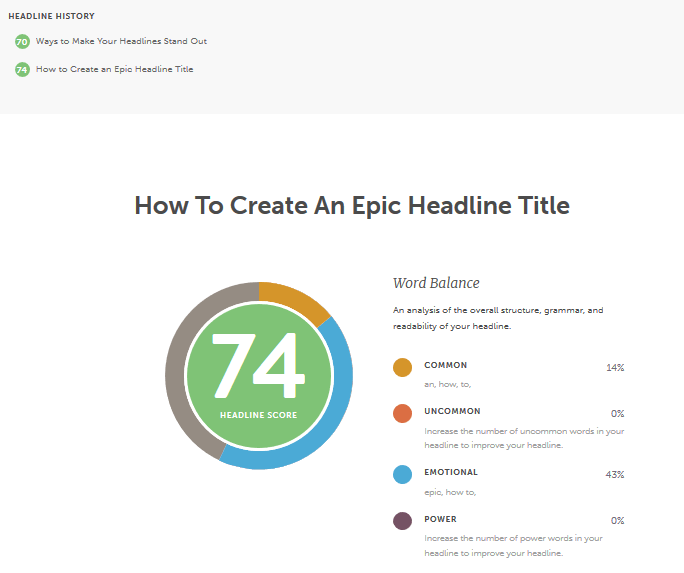
If you need help with coming up with killer headlines to test on your website, check out the free CoSchedule Headline Analyzer tool to guide you. All you have to do is enter the headline you want to analyze and see what the results are.
From there, you can choose the best ones to add to your website and test using Title Experiments.
Step 4: Evaluate Your Results
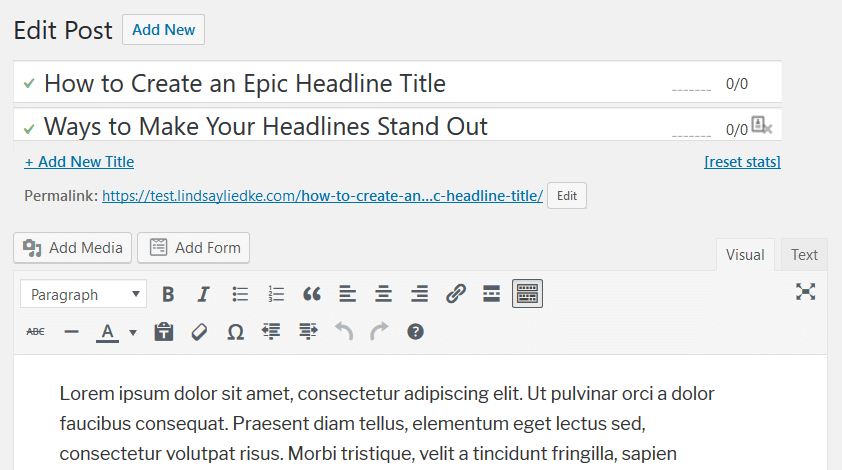
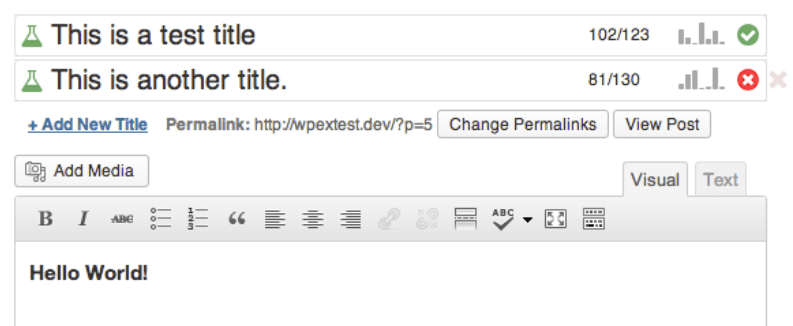
Navigate to your blog post editor to see the following results:
- Impressions: records every time a headline appears for a site visitor.
- Views: records every time a site visitor clicks on a headline.
You’ll see a green check mark next to the headline that is performing the best, and a red x next to ones that are not performing well.
After you’re done split testing, you have the choice to delete the poorly performing headlines, or simply leave them. Either way, Title Experiments will begin to show the more favorable headline to site visitors more often and those headlines that aren’t performing less.
Keep in mind that return site visitors will always see the same title they saw the first time they visited your website.
The above image is just an example of what you’re A/B test results may look like. You should run all split tests for at least two weeks, and sometimes longer, depending on how many people visit your website on a daily basis.
And there you have it! You now know the importance of split testing and how to start A/B testing your site’s headlines using the Title Experiments plugin.
Knowing that split testing elements on your website is helpful, whether it be your headlines, CTA buttons, images, or even landing page copy, is not enough. In order to succeed, you have to perform these tests on a regular basis and tweak things to make them better for your site visitors. Only then will you reap the rewards that A/B testing of your website has to offer.
That about covers it for us. Do you have any other tips or tools to use for performing A/B tests on your WordPress website? We’d love to hear from you. Feel free to sound off in the comments below.
What to hear about our latest deals and new posts? Subscribe below 👍

